Heres a list of things that were replaced:
Front/rear shocks= Koni red $650 from their website
928 motorsports ride height adjusters= $300
Front springs= Hypercoil 2.5" 850lb, $120
Rear springs=red used 650lb, $50 with all 4 shock tops included
Sway bars= $500 from 928 Specialists
Steering rack= $225 after core returned
Tie rods= $110
KRC aluminum power steering pump= $325
Braided lines/hardware for steering system= $150
37 degree flaring tool= $30
Shorter accessory belt= $15
Grand total=$2475 and an empty bank account
Let the onslaught of pictures and mind bogglingly complicated processes begin
New rack, shocks, height adjusters, and springs.

Heres the new KRC pump, lines, hardware, and accessories. The pump also included a nice fluid reservoir and aluminum mounting bracket

The KRC pump is not only sexy to look at but extremely light. The stock 928 pumps weighs 4 times a much!

First step for the pump was measuring, then cutting the braided lines; followed by installing fittings on each end.

one out of 3 done.
also no, thats not a 928 wiring diagram, its actually for my cbr600RR powered military spec buggy... which may or may not be running

Old, heavy, leaky power steering pump is removed

New mounting plates are on.

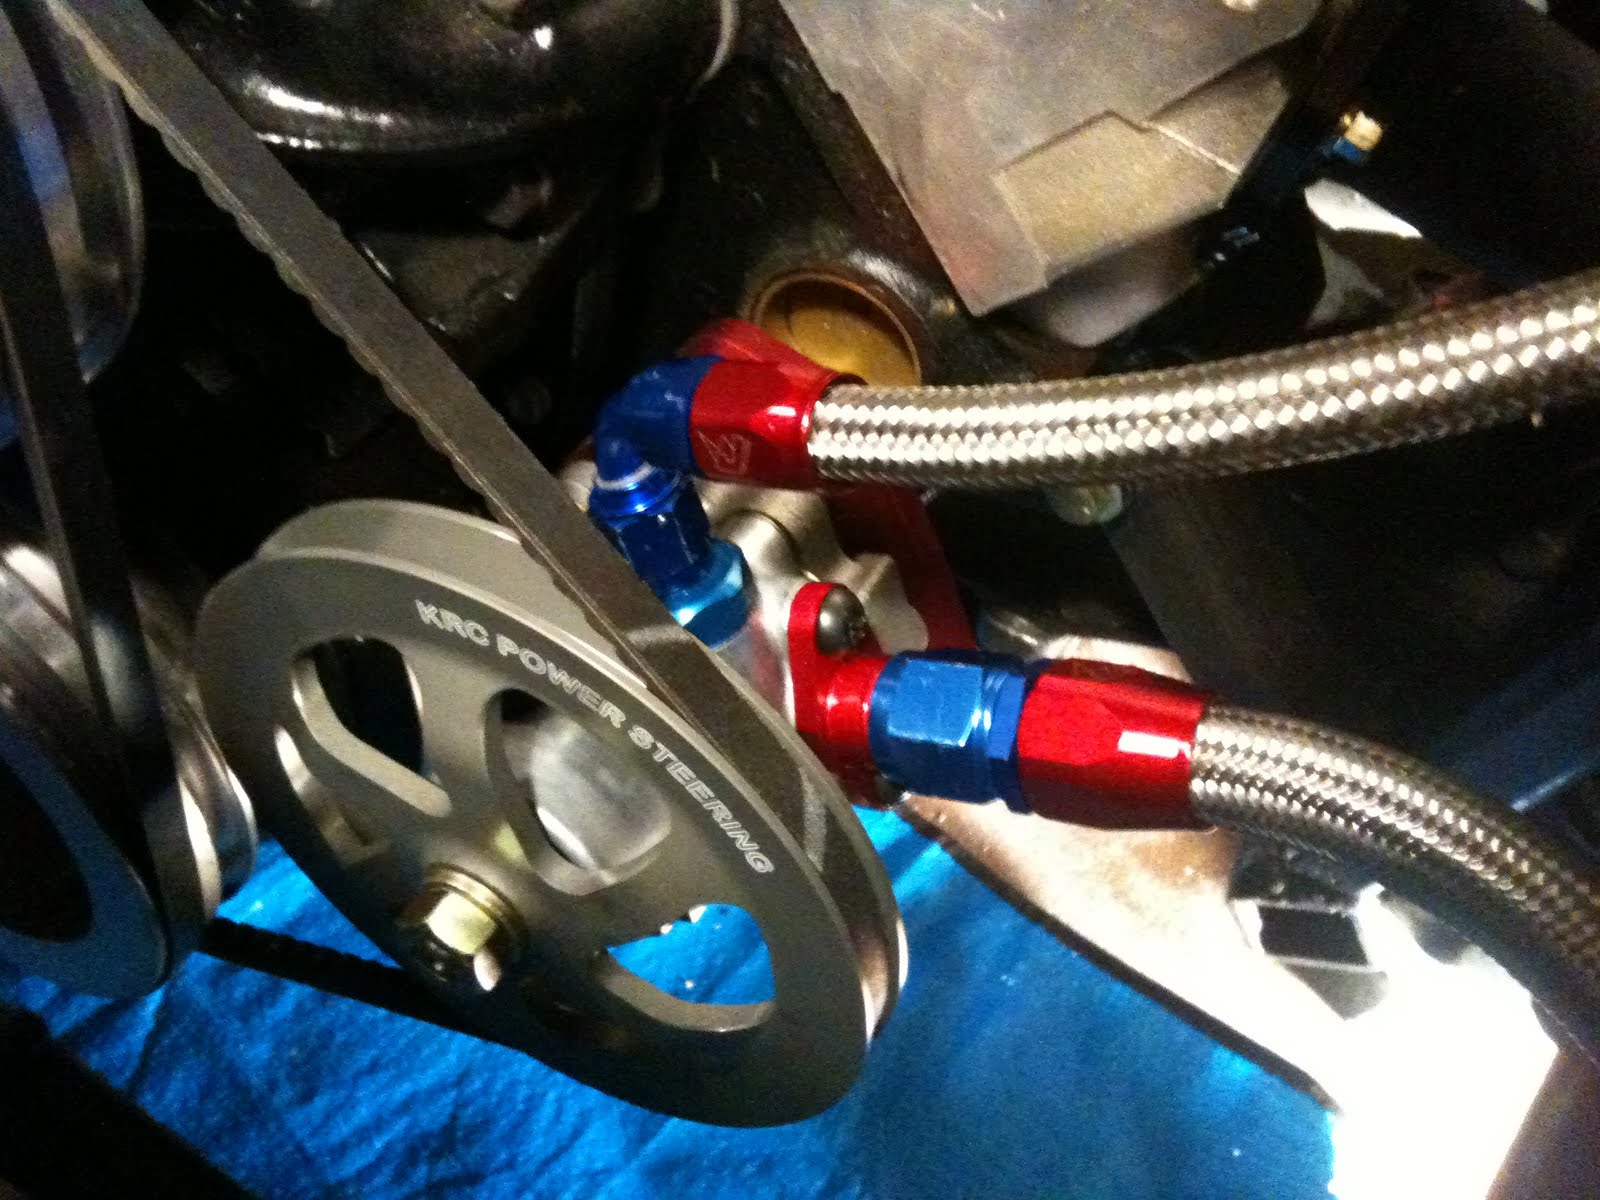
After bolting everything down and installing the new pump I realized the pulleys were out of alignment (pictured below) so a few spacers and new bolts were added to minimize the chances of throwing a belt.

Next the reservoir was mounted where the old one used to be then connected the fluid return line.

Theres no way around it, this part sucks. Not like loosing your legs sucks, but more like getting them ripped off then sowed back on multiple times sucks.
Step one: rent a flaring tool from autozone

Step 2-5: realize the futt bucking parasite at autozone lied and told you the flaring tool you just rented is a 45 degree, not the 37 degree needed. However only do this after you have flared both hardlines, re-attached them, and proceed to do this over and over to find where the leak is coming from. Then proceed to order the correct one online and wait for it to arrive...

Step 6: Do it all over again with the correct flaring tool

Finished product with no leaks:

close up of the ex-leaky sections

Once the lines are back on its time to hook all the lines up and tighten the belt
Congratulations, you are now officially 1/4 done this massive pain in the ass project...
time to take the old rack out and drop the stock sway bars

With the sway bar disconnected, cut the old rack boots off and cover your eyes cause more shit comes out of those than after taco night (learned that the hard way)

Get a big ass wrench and take off the inner tie rod

Make special attention to damage at least 2 fingers on each hand during this project, because if you haven't then you are probably not doing it right.

Now take out the cotter pin and remove the bolt holding the outer tie rod

You will have to remove the rotor and caliper in order to hammer the top of the tie rod out. Some people had ball joint remover but I had no success using mine.

Old vs new tie rods

The new steering rack came with usable mounts but I already had the solid aluminum ones.
time to bust out the air hammer to remove the rubber ones.

Misc instructions and warning that came with the rack.

Old bushings out, new ones in

Before installing the rack, remove the plastic plug on the bottom and turn the rack until it is centered as pictured below.

The old copper washers were destroyed as well as one of the banjo bolts so I ordered new ones from Rennbay (some of the best customer service ever) for $30.

Install rack, tie rods, boots, and attach steering column

Hooray, done with steering stuff. Only 4 shocks and 2 sway bars left... damn I wish it was as easy to say as it was to install
First step to removing the front shocks (once the caliper and rotor are removed) is to loosen the lower shock bolts.

Next is the 2 bolts holding the front of the lower control arm

Special step for the 928 hybrid: remove the bolt that attaches the lower control arm mount to the motor mount

The lower control arm should drop down, just make sure there is something to support it underneath

Once the 3 bolts on the shock top are removed the shocks should come out with some persuasion. I would highly recommend using spring compressors to remove the shock tops. However, if your a curious bastard such as myself and want to see what happens if you dont use compressors, make sure you have some tall ceilings cause these things will launch 20ft in the air easily.

In order to install the 928 motorsports height adjusters, all you have to do is chuck the shocks in the freezer and the adjusters in the oven for a bit, and they should just slide right on.

With the sleeves on and the shock tops installed the coilovers are ready to be put back on

Quick side note: If you have just spent like $1500 on suspension components, the last thing you want to see is a label telling you that if you adjust your suspension your balls will fall off...

Install the shocks and bolt it all back up

Here are some shots of the finished product:


Now time for the front sway bars...

If you plan on running the sway bars on the stiffest setting like I am, than you must reinforce the stock sway bar mounts or they will rip apart like wrapping paper on christmas.
This requires welding a 1"x 1" piece of square steel tubing about 5" long between the frame and the back of the mounting point. Make sure you disconnect any and all computers, ecu's, or whatever before welding on the car because they will short out and probably be fucked if you dont.

Make sure you have a fuzzy welding assistant to lick out any fires you make

Add a shot or 2 of paint to prevent rusting and your good to go.

Nice new poly bushings (make sure you add grease) that dont disintegrate when you look at them wrong

Completed front shocks and sways.

By this point your fingers will be destroyed, you will be covered in 30 year old german suspension sludge, and you will almost certainly thinking you should have just gotten a spec miata instead of this insane bastard car...
But then after a few beers you have a revelation that miatas are for girls and the noise of a 6.7 liter V8 is enough to make your pants shrink. This is when you get back outside and start to tear apart your rear suspension.
First step, rotors and calipers are removed.

then take off the dust shield.

Loosen lower drop link mount and both ends of the lower shock mount.

Make sure you remember the order of the parts falling all over the ground because they will need to go back in the same order.
Or just take pictures like I did.
After the long bolt is removed the shock should just slide out once the top is unbolted.

I didnt take pictures of the few bolts that had to be loosened/removed to drop the transaxle to get the rear sway bar out but I have all the links and PDFs on my computer if anyone needs them.
Heres the new rear sway bar with the bushings installed

Slide the new bar in and line the bushings up before you install the bar because once its in, there a real pain in the ass to slide around.

Installed new shocks and sway bar drop links (note: my dumbass put the top of the drop link on the wrong side, so disregard that)

Another view of the drop links installed incorrectly

Almost done, just fix the rear drop links you installed the wrong way and admire your work.

Bonus stuff:
I attended the first Rallycross ever in the U.S. at NJMP a few weeks ago and had the privilage of seeing Tanner Faust, Travis Pastrana, Dave Mirra driving... and crashing. Ken Block brought his car to the event but forgot to bring himself
Anyway here are 2 good videos I took.